This guide provides you with an introduction to the changes made in the new editor, as well as guidance on how to best use both the old and new features.
[Insert video]
Overview of the New Editor
Preheader:
The preheader has been moved to a new location under campaigns. It’s now placed on the first step together with the subject line:

The preheader functions as a short, descriptive teaser that gives the recipient a quick insight into the email content. It typically appears below the subject line in the recipient’s inbox and can help increase open rates.
At the end of the preheader field, you also have easy access to insert merge fields, which makes it possible to personalize the text – for example, by adding the recipient’s name through a merge field.
Cells:
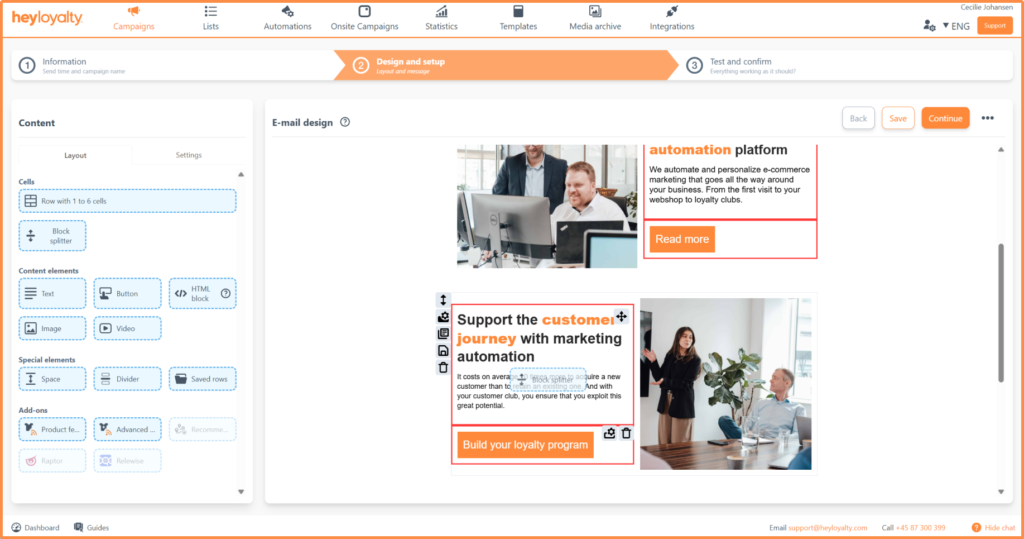
In the new editor, the content menu has been moved to the left side of the screen.
To add content to your campaign, you need to drag a cell row into the campaign, which was previously called a “block”. Once the cell is inserted, you choose how many cells it should be divided into. Then you can insert content elements into the individual cells.
In the old editor, you could adjust the width of cells by dragging a handle. These handles have been removed, but you can still customize the width by using cell settings, where you can specify the desired width:

Row and cell settings:
From the editor, you have access to edit row settings and cell settings.
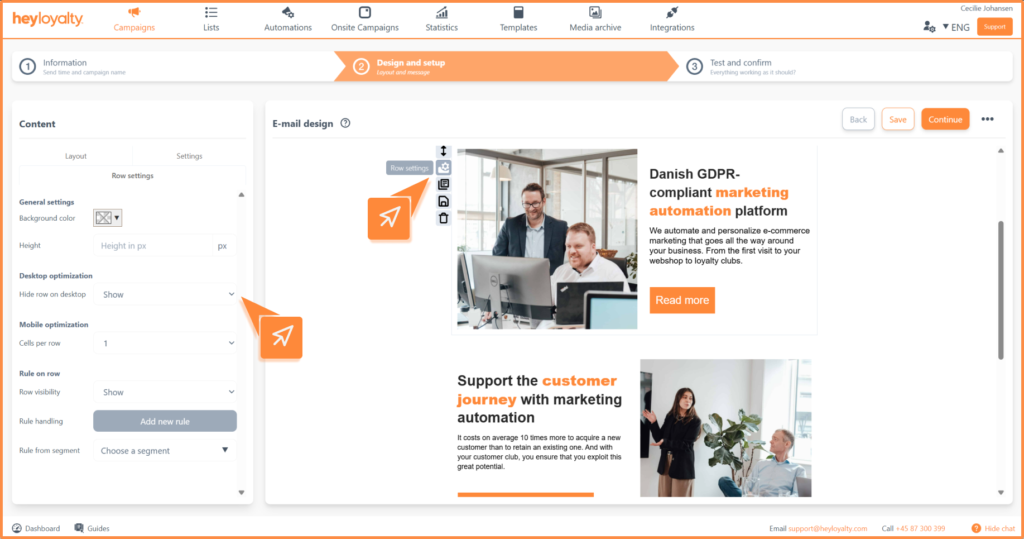
Row settings:
You can change settings for a row by using the menu to the left of the row. The settings will apply to the entire row.

In the row menu, you can also duplicate the row, save the row, or delete it.
Cell settings:
To change the settings for a specific cell, you need to use the menu in the bottom right corner of the cell.
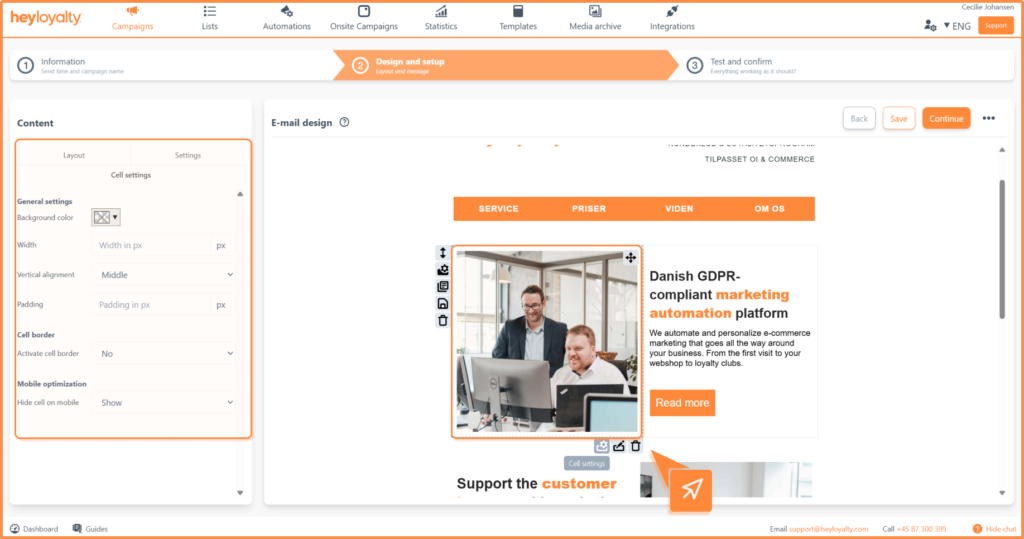
From this menu, you can also access the settings for the content element placed in the cell.
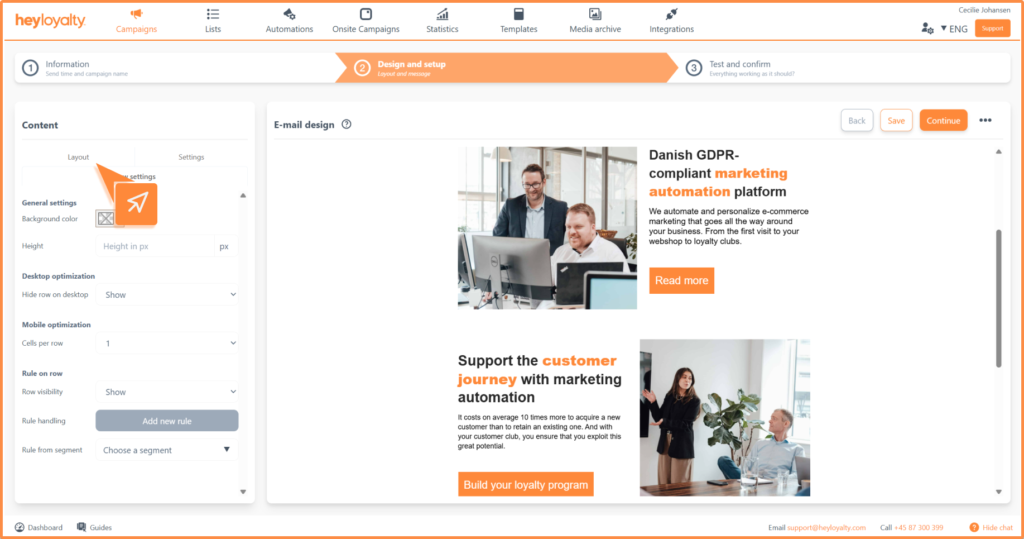
Inserting content
You can always add new content to your campaign. This is done via the Layout tab. If you’re in the settings of a row or cell, you always have access to Layout, where you’ll find all the content elements.
In the previous editor, it wasn’t possible to hide content on desktop – but we’ve changed that.
In the new editor, you now have full control and can choose whether a row should be visible on desktop or not. You can easily do this under Row Settings > Desktop optimization.
Block splitter:
The block splitter’s functionality has been expanded in the new editor.
You can now use the block splitter in cells that have content. When you drag the block splitter over a cell, a popup appears where you choose how many blocks the cell should be divided into. Then you can insert content into each new cell:

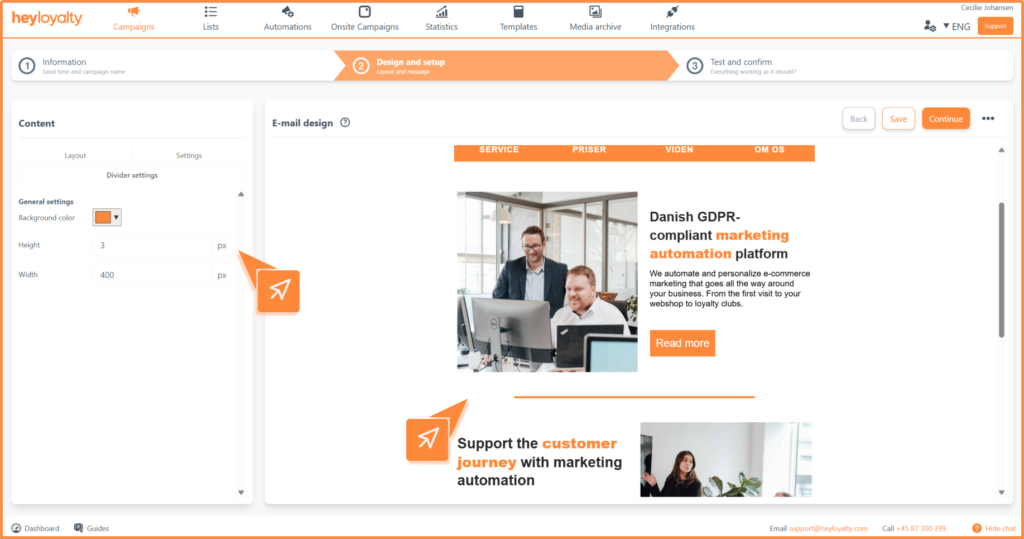
Divider line:
With the new editor, a special element called Divider line has been introduced.
This element can be used to separate content in your newsletter. Under settings, you can customize the divider line’s color, width, and length.
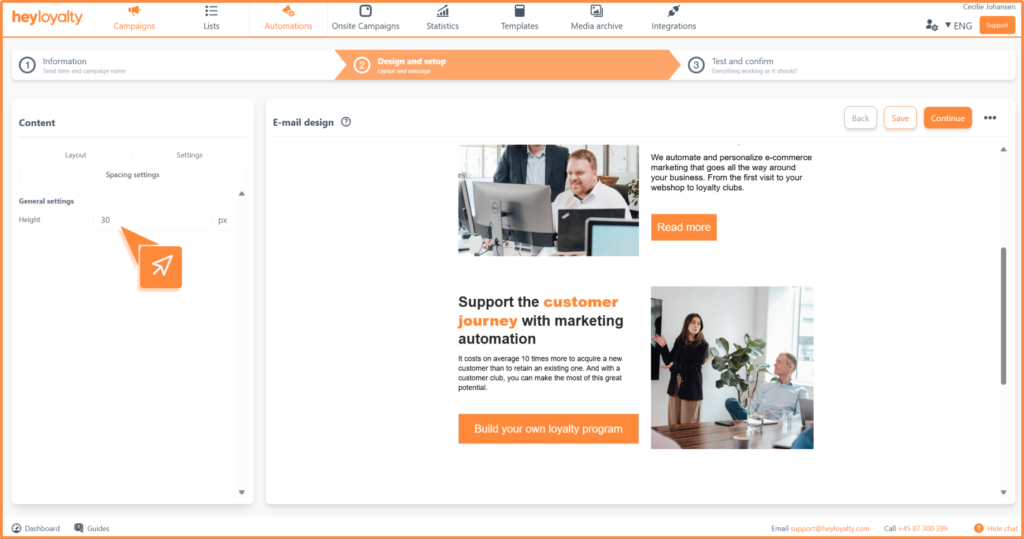
Space:
In the new editor, a new special element called space has been added.
This element is used to insert distance between your rows. Once inserted, you can adjust the height of the space via the element’s settings.
Template:
You can change templates from the editor and create a default template.
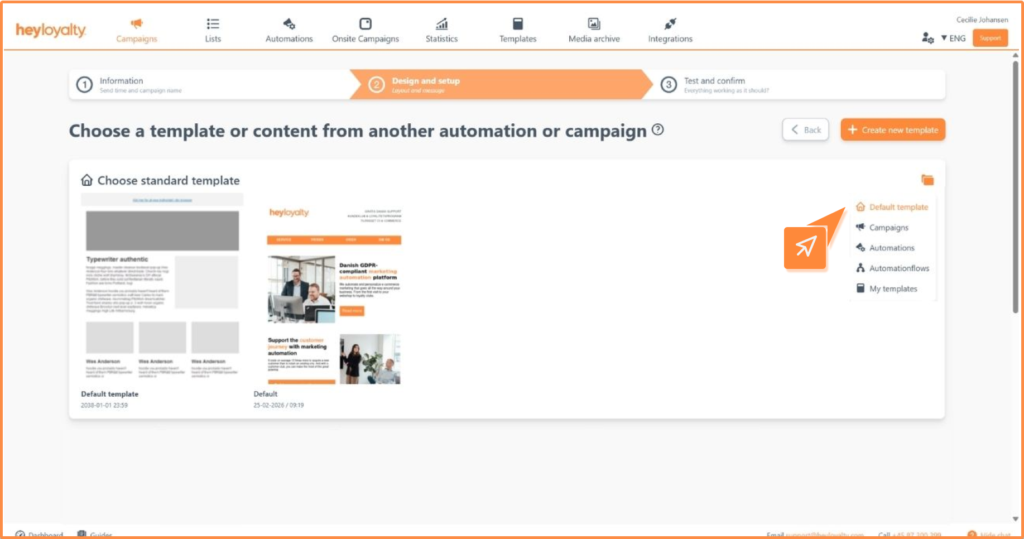
New template:
The “New template” function is now located under the three dots (•••) in the editor.

When you want to select a new template, you’ll be taken to the step where the template is chosen. Here you have the option to select a new template for your email.
Default template:
If you want to save a default template, you’ll also find this option under the three dots (•••) in the editor.
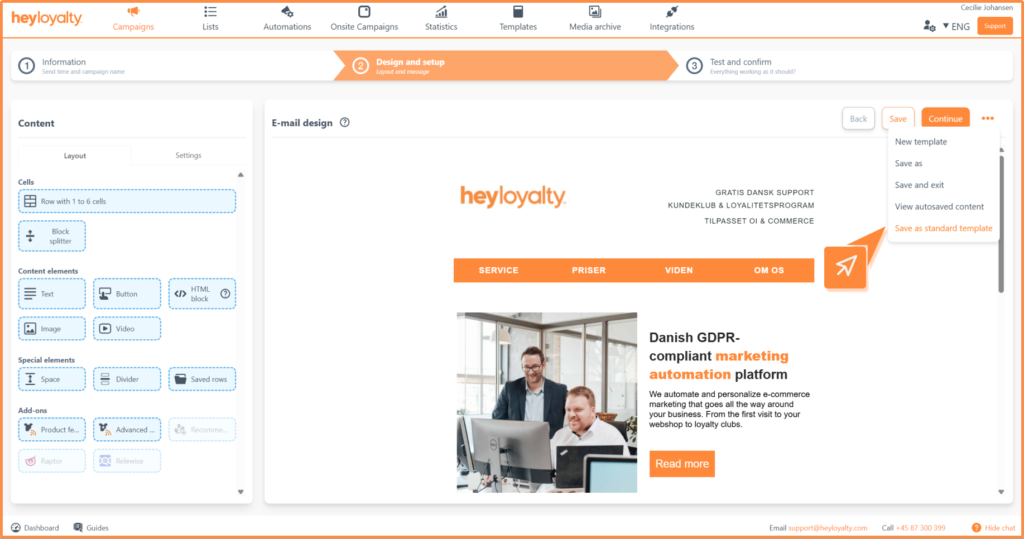
When you save a default template, it will be available in the folder: default templates, the next time you need to select a template:
Product feed
When you set up your product feed in the new editor, you’ll encounter a new interface. However, the functionality is the same as in the previous editor.
The product feed settings are found on the left side:
At the bottom of the product feed settings, you can:
- Choose which products to display.
- Sort the products in the desired order.
- Remove products you don’t want to use after all.
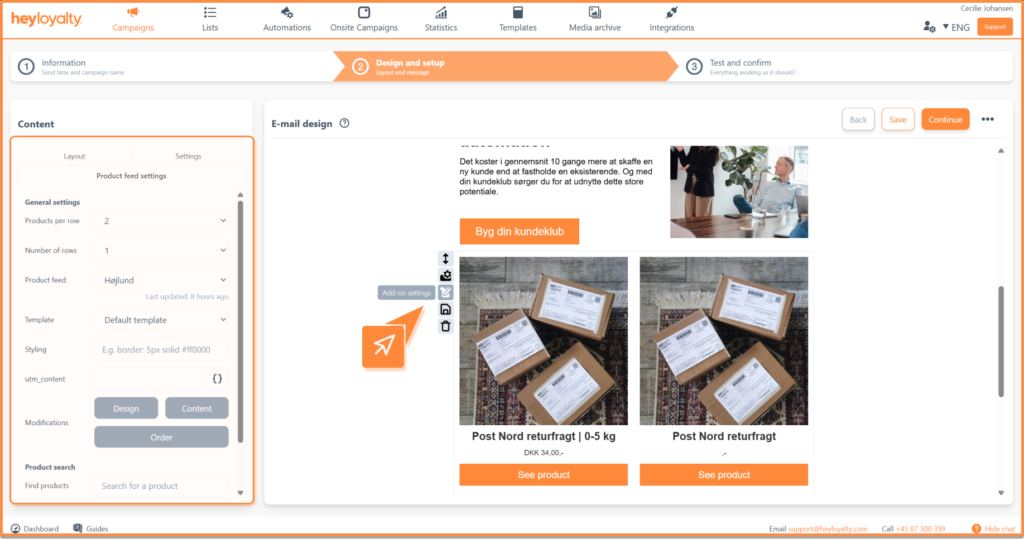
If you want to change the design or content of the products you’ve inserted in the feed, you can use these buttons:
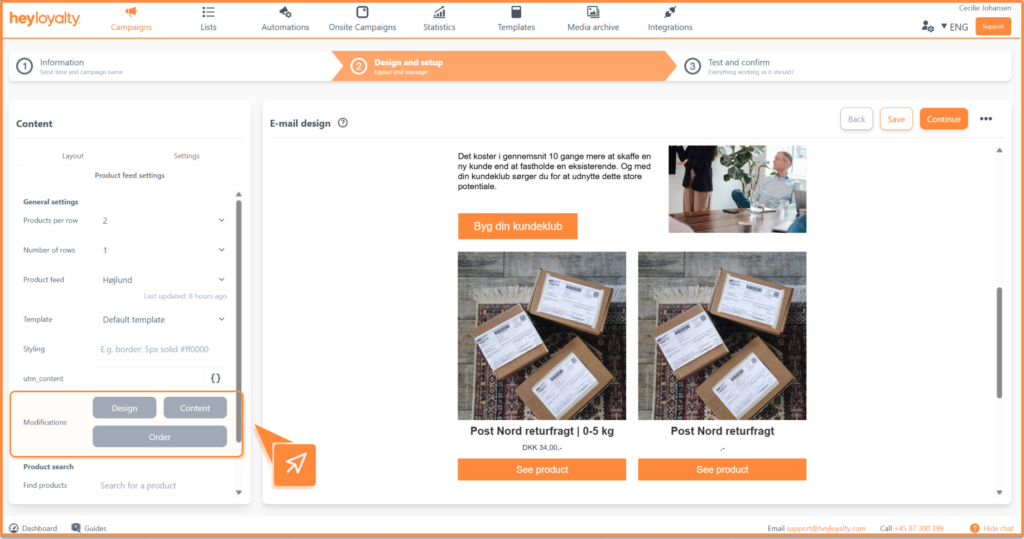
When you use the buttons, you can set the following:
- Use the Design button (for default template) to customize the visual appearance.
- If you’re using a custom template, you’ll see HTML code that you can edit manually under design.
- Under Content, you can change data like title, price, etc.
- If you select the order button, you will get a preview of your products. Here you will use drag and drop to adjust the order of the products.
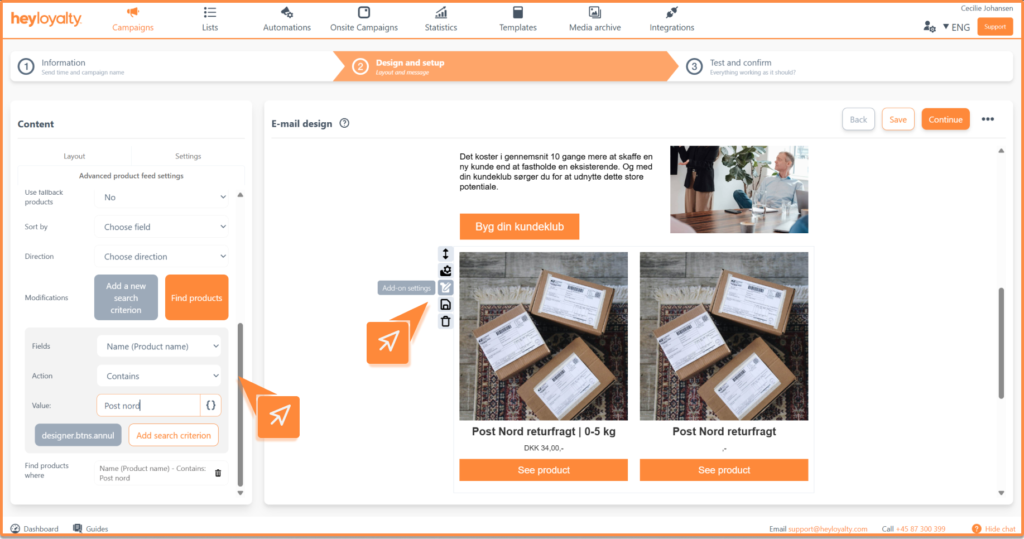
Advanced product feed:
Advanced product feed can now be added as a content element in your email template.
The settings are configured in the same way as for regular product feeds.
To retrieve products, you need to set up one or more search criteria – for example, product category, price level, or similar. Once the criteria are specified, you click “Add search criteria” and then “Find products”.
Here’s an example of a search criteria:
Ready to use the new editor
You’re now ready to set up your campaigns and flows in the new editor.
When you’re finished setting up your email, we recommend saving your content and proceeding to step 3, where you can test the email and prepare it for sending.
Hvis du mangler information eller hjælp, som du ikke finder her på guide sitet, er du altid velkommen til at kontakte vores support!
support@heyloyalty.com / tlf. 87 300 399
Leave a Reply