Integration to Meta: What is it and what does it require?
IMPORTANT: Denne opsætning skal laves af en medarbejder, der har adgang til både din virksomheds Facebookside samt annoncekonto.
The employee must have access to the following on the Facebook page as a minimum: Content, messages, ads and insights and Leads.
The employee must have access to at least the following in their ad account: Manage Campaigns (Ads), View Performance and Manage Creative Hub Mockups.
Med en integration mellem Heyloyalty og Meta kan du lave annoncer på Metas platforme. Du kan sende dine medlemmer fra Heyloyalty over til Meta og tilføje eller fjerne disse medlemmer fra et customaudience på Meta. Dermed kan du lave annoncer på Meta, som kun rammer de personer, der er tilmeldt dit nyhedsbrev. Laver du leadads (hvis mål er at få folk til at tilmelde sig dit nyhedsbrev) kan du på samme måde sørge for at ekskludere de medlemmer, der allerede ligger på din liste i Heyloyalty – og dermed undgår du at bruge annoncekroner på at vise din annonce til personer, der allerede er tilmeldt dit nyhedsbrev.
Ved at sende dine medlemmer fra Heyloyalty til et custom audience på Meta, kan du dermed også lave loyalitetsskabende annoncer, fordi du er sikker på, at dem der ser annoncen allerede er tilmeldt dit nyhedsbrev.
Setting up integration for Meta
IMPORTANT: This setup must be done by an employee who has access to both your company’s Facebook page and ad account.
The employee must have access to the following on the Facebook page as a minimum: Content, messages, ads and insights and Leads.
The employee must have access to at least the following in their ad account: Manage Campaigns (Ads), View Performance and Manage Creative Hub Mockups.
When you are sure that the above is in place, this employee can log in to Heyloyalty and make the setup as follows:
Set up Meta – leads ads and audiences in Heyloyalty by clicking Integrations –> List integrations –> Meta – leads ads and audiences –> Set up integration –> Activate Meta
Facebook will now open a new window.
Here, click Edit Access and make sure your Business’s Page is selected. There must be a check mark next to the Facebook page and ad account in question. Then click Continue as *your name*.
In Heyloyalty, you can now click on Create Meta integration. After you clicked Continue as *your name* in the previous step, you should have come back to Heyloyalty. Alternatively, you can find your way back by opening Heyloyalty and clicking Integrations à List integrations –> Meta – lead ads and audiences –> Edit integration –> Create Meta.
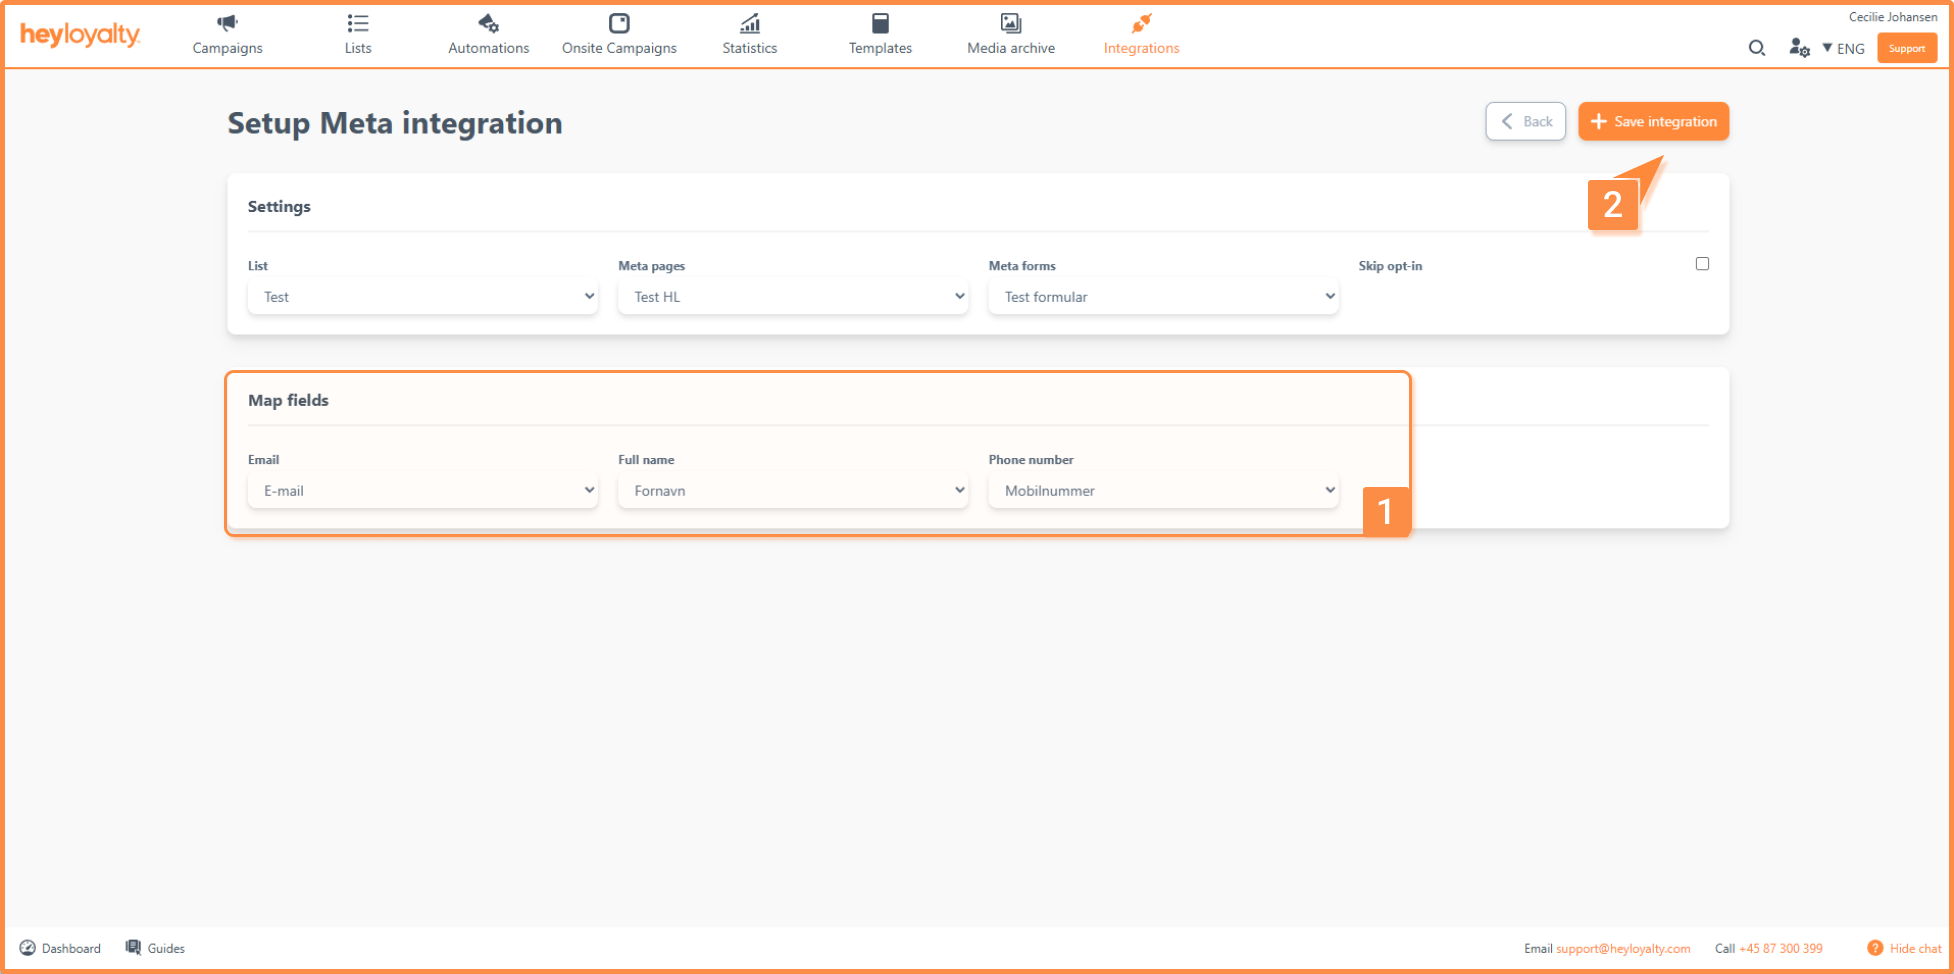
Here you must select which of your lists in Heyloyalty the integration should be linked to in the List field. In Meta Pages, select the Facebook Page (and the associated ad account) you want to use. In the Meta forms field, select the form that you use for your lead ad.
New fields will now appear under Mapping of fields.
The fields you can see here are the fields used in the selected form.
Tip: Please use Firstname and Lastname in your forms on Meta, so you can make this distinction in Heyloyalty as well. If you use Full name in your form on Meta, then the member’s entire name will be entered in the First Name field in Heyloyalty – this sometimes causes some inadequacies when you want to use the First Name field in your emails to members.
Repeat this process for each additional form that you actively use in your lead ads on Meta.
Tip: Heyloyalty recommends that you log in to the Business Suite on Facebook and find your active lead ad and send a test lead. By doing this, you ensure that the registrants get into Heyloyalty correctly – or you spot an inconvenience that you can correct in the setup in Heyloyalty or in the setup of the form on Meta.
Hvis du mangler information eller hjælp, som du ikke finder her på guide sitet, er du altid velkommen til at kontakte vores support! support@heyloyalty.com / tlf. 87 300 399


Leave a Reply